


Unsure of how to start a band?
Every musician has been there.
Before you’ve been in a few bands, creating one is an intimidating thought. You have no idea how to get the right people on-board or get the gigs you need.
So today, we’re going to go through each step, one at a time.
Here’s the 10 steps it’ll take to start your own band…. TODAY.
I’m guessing you’re here because you want to make your mixes sound professional. We put together a brief training that covers a totally new approach to music production. Until now, everyone has been teaching production totally backward. Just click below to watch.Get industry-quality every time (steal this framework)
But if you just want to learn all about Starting a Band specifically, keep reading.
STEP 1: Find Your Bandmates
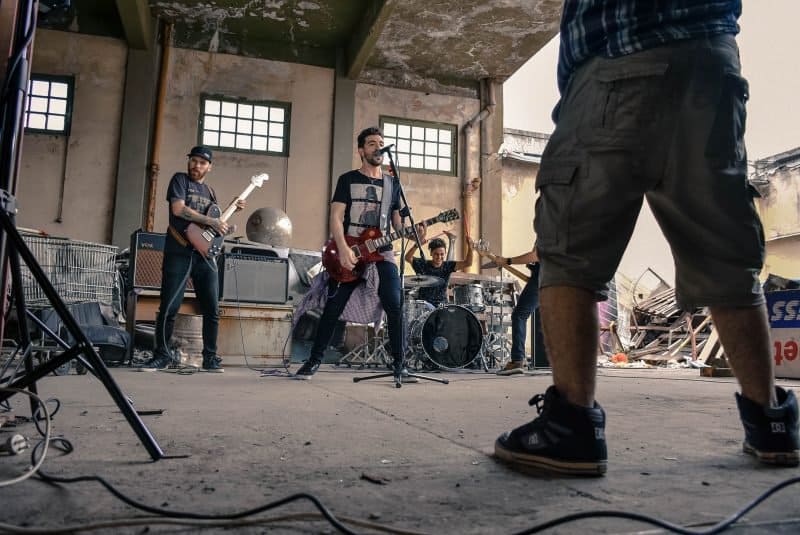 The first thing you need to start a band? The members of the band.
Traditionally, you’ll need a drummer, a guitarist, a bassist, and a singer.
But these days, your band can be made up of just about anything. Pianists, synth-players, horn players, and multi-instrumentalists are becoming more and more common. Many bands
even don’t use guitars anymore.
The only two instruments you should definitely consider having are a drumset (acoustic or electronic) and something to hold down the low end. This could be a bass guitar, an upright bass, a piano, or a synthesizer.
There are exceptions of course (The White Stripes, for instance), but these two instruments are very, very common.
Once you decide on the kind of musicians you need, it’s time to hit the pavement.
One way to find your bandmates is to make posters. Design a simple poster that talks about your sound and what instruments you’re looking for. Have several tearable strips at the bottom with your name and phone number on them.

You can also use social media. It’s a powerful communication tool when you’re trying to reach out to new people. Try putting the poster you made up on Facebook,Twitter, or Instagram. You could also post it in various local music groups on Facebook.
The strongest tool in your toolbox is your network. Ask your friends! See if they’d be interested in joining, or if they know anyone who would be a good fit.

Word of mouth is one of the most effective ways to get the message out.
Before you decide to put someone in the band, get together and jam with them. See what their talent level is and if their style blends with your own.
Most importantly though, make sure that you have chemistry together.
Your bandmates don’t have to be the best players in the world. That can come with time.
But you do all have to get along!
You’ll be spending a huge amount of time with these people. Make sure you have enough of a rapport to stand being in the same room with them.
Step 2: Find Your Sound
The next step is to figure out what your “sound” will be.
 This happens naturally over time, of course. But you can get a pretty good idea from the beginning if you’re intentional about it.
At your first band meeting, talk about your influences. Who are your favorite artists? What’ve you all been listening to recently? Are there any genres that you have in-common?
Your sound is likely going to be somewhere in-between those answers.
Make sure to check out any songs that your members have already written. What genre do they tend to write in?
Finally, jam a little bit. What sound organically comes up? You’ll want to write in a genre that feels most natural to all your bandmates.
One important thing: make sure to pick a genre that your singer can sing well.

All instrumentalists can change their style and their gear with time. But singers have only one piece of gear – their voices.
So make sure to pick something that sounds good with what is arguably the most important part of every song!
Step 3: Find a Place to Practice
You’ve got a lot of options. Where do you have access to?

Basement?
Garage?
Church?
Music venue before hours?
Professional rehearsal space?
Storage cube?
You can get creative to find somewhere you can meet and get loud.
Just make sure the place won’t get you in trouble. After a few noise complaints to the police, you’ll get some serious fines if you keep practicing there.
If you’re meeting in a place that’s prone to this, try soundproofing the room.
Step 4: Start to Write Your Songs
Next: time to write some songs!
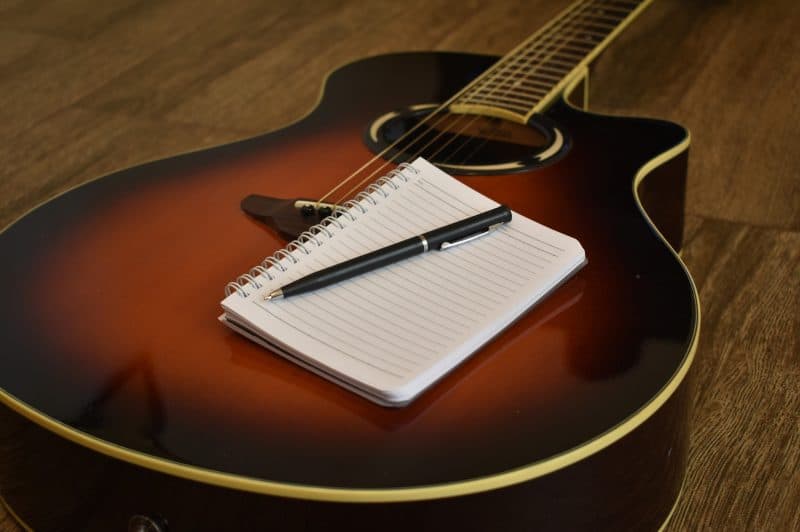
This is the exciting part. There’s nothing better than the artistic expression of creating something entirely new.
Go wild. Be as creative as you want.
Before you start, though…
Learn a few covers.
It may sound boring, but it’s important. You want to make sure your group has learned to play well together before you start writing.
It will make the entire process ten times easier.
Once you’ve learned to play nicely together, really dive into the writing process.
Songwriting prompts are a great way to get new songs started.
To headline a show, you’ll need around twelve songs at least. That should be your goal at first.
But don’t sacrifice quality for quantity. It’s more important to have six amazing songs than twelve average ones.
Take your time. You can always play opening gigs (or covers) until you’ve written the amount you need.
Once each song is written, make sure to get it copyrighted.
Doing that will keep your song from being stolen by anyone else. If someone plagiarizes your music, you will have the power of the law on your side.
It’s a simple process to do so. Head to your nation’s copyright office website and start to fill out the forms.
Step 5: Come Up With A Cool Band Name
Time to head to the coffeehouse.
 You can’t play shows until you come up with a band name. So while you’re writing songs, be brainstorming with your band members.
My favorite technique is to get everyone in a room and stream-of-consciousness-style name any combination of words you can think of.
After an hour or two of this, you’ll have pages and pages of potential band names. A lot of them will be crap, but you’ll have ten or fifteen really great ones.
If that doesn’t work for you, have your band members go through their music libraries.
A lot of great band names are references to music they like. Maybe use a name that’s inspired by one of your favorite songs. If it’s fairly obscure, it’ll be seen as original by the music community.
Make sure to pick names that are short and easy to spell. As an added tip, I like to pick names that will show up easily on Google.

A favorite example of mine is my favorite childhood local band, The Wedding. They were an absolutely incredible rock band, but they suffered from having a nearly-unsearchable name.
You could type in anything you wanted into Google – The Wedding, The Wedding Band, The Wedding Rock, The Wedding Music, The Wedding Fayetteville (my hometown) – but every single thing would come back with results on actual weddings.
Try not to make the same mistake. Type your potential names into Google and see what comes up. If very little does… perfect. That’s a hole in the internet you can fill.
Once you’ve picked a few potential names, make sure to check if there are other bands with that name on Facebook, Soundcloud, or your nation’s trademark office.
If you find anyone with your potential name on social media, see how many followers they have. My rule of thumb is that it’s less than 250, the name is safe.
But if the name shows up in a trademark search, it’s undoubtedly off-limits.
Also, make sure the URL for any potential band name is open. You don’t want to go all-in on a name, just to be unable to have any kind of web presence.
Step 6: Make a “Band Agreement”
![]()
In-fighting is the number one reason that bands break up.
Make sure you minimize the possibility of that by creating an agreement for each band member to sign.
This idea can freak many people out at first. “Why do I need to make a contract just to play with my friends?”
It’s not really about having a “contract.” It’s about splitting up responsibilities and resolving tension before it even happens.
It’s about setting some healthy precedents!
Make sure you don’t do this right when the band is starting off, though. You don’t want to spook any potential members with important business decisions.
Here’s what you need to make sure is on the band agreement:
Time Commitment

First things first – agree on how committed each member of the band is.
How often will you be practicing? What are the expectations?
Do they need to come to practice already knowing the songs? Do they need to work their schedule around gigs?
Agreeing on this now will keep your band from resenting someone who didn’t show up to practice because they didn’t know what the expectations were.
Plus, if someone’s not holding up their end of the bargain, it helps to resolve conflict. You can easily say, “Hey, I know you haven’t been doing [x]. I understand that it’s tough to find time, but you did commit to this when we all signed the band agreement. We’re all in this together”
That’s a much easier sell than, “Hey, you haven’t been doing [x]. Dude, are you committed or what? Start doing it now.”
Remember: each band member needs to be putting in the same amount of work, and each band member needs to be able to make it to rehearsal!
Band Responsibilities
Next thing to do is to divide the responsibilities.

There’s a few roles that someone in the band needs to take.
First off, there’s the bandleader.
This person acts as the representative of the group. They’ll be talking to venues, labels, and journalists about the band.
They also have a little more power than the rest of the band roles. They can to hire or fire members. They’ll make the final decision if the band is split on something.
Ultimately, the buck stops with them. They’ve got more power, but also a lot of responsibility!
This person should be outspoken, passionate, and patient. Traditionally, the role of “bandleader” is usually the singer.
Next, there’s the rehearsal director.
This person organizes a schedule for each rehearsal and keeps the group focused during practice time.
They’ll also lead each rehearsal. The means while the band is practicing, they’ll be listening for notes on song arrangements or their performance.
As the band rehearses, they’ll dictate what needs to be focused on.
Oftentimes, this role is also handled by the bandleader. There are lots of exceptions, though.
The rehearsal director should be the one with the best “ears.” They’ll need to be performing and listening to their bandmates at the same time.
After that is the public relations manager.
They’ll be in charge of your image, your brand, and any media your band needs.
They will schedule photoshoots, write bios, and create flyers.
Any kind of promotion your band needs will be their responsibility.
Finally, there’s the bookkeeper.
They keep track of all of the band’s finances for tax purposes.
They keep receipts and spreadsheets to keep the band on-budget whenever you are touring or purchasing gear.
It’s a dirty job, but somebody’s gotta do it.
Those are the main 4 roles, but each band is different. Your band might have different needs. Do some brainstorming and make sure that each responsibility is being covered by someone!
Finances

This is a big one to iron out early so that fights don’t break out when you start to make a little money.
First off – who pays for what?
Oftentimes a band will create a “pool” for expenses that each member contributes the same amount into.
Whenever something is bought, the money is reimbursed from that pool.
You can decide to do this however you want, but this is how I’d recommend it.
Next, what equipment do you need?
Decide on that early so that the band isn’t caught with unexpected expenses.
After that, how does each band member get paid?
Will you be paid by cash, check, or direct deposit? Does any money get taken out of each paycheck to go into the expense “pool?”
Your last question is this: Who owns the songs?
This is important to figure out early, because the person who owns the song gets the publishing royalties.
Some bands decide to split every song evenly between each band member.
Other bands decide that the person who writes the lyrics is the sole songwriter.
Another option is to make it a case-by-case basis. Maybe one of the songs is primarily written by two of the members. Maybe another song was written during a rehearsal that someone couldn’t make it to.
Be careful with choosing this last option. It’s so open ended that it could lead to disagreement. If you pick it, really try to define all of the possibilities so that you’ll know what to do when the time comes.
Step 7: Record a Demo

If you have the tech, then recording a demo or two is the next step.
You want to have something that you can send venues when looking for gigs. They need to be able to hear what you sound like if you ever want them to give you a shot.
Once you have a few songs recorded, it would be a good idea to edit them together into a 30-second mashup.
If the venue owner sees that the audio clip is short, he or she is more likely to listen to it.
If you’re wanting some help getting a good sound on those demos, check out our Demo to Pro course.
It takes your songs from sounding like basement demos to radio-ready mixes. And if you’re wanting to send songs to promoters, you want them as close to radio-ready as possible!
Step 8: Pick Your Look
Your look is more important than you think.

A lot of beginner bands will wear whatever they feel like in their first few gigs.
If there’s not some level of consistency, it’s pretty jarring to the audience.
Remember: You are performers! You’re putting on a show. People need to be able to understand what your “deal” is throughout the show.
You don’t have to all be wearing the same thing. A uniform isn’t necessary (unless that’s what you’re going for).
There just needs to be a similar “vibe” across the band.
If most of the members are wear canvas shirts and jeans, but the singer is wearing a suit, it’s going to confuse the audience.
Or if most of the members are wearing black, but the drummer comes out in a bright blue polo and cargo shorts, no one’s going to understand what you’re going for.
Whatever you decide, embrace it. Commit to the characters you want to play.
If you do that, you’ll put on a killer show.
Having a consistent look will also be helpful once its time to make your own merch.
Step 9: Start Searching for Gigs
Once you’ve got your name, your look, and your songs, it’s time to start playing some shows.

To do that, you’ll need to convince venue owners to let you play there.
The first step is to build an Electronic Press Kit, or an EPK.
This is basically a music industry resume for bands.
Set up a simple website using Wordpress, Squarespace, or Wix.
On the site, include these things:
- Any music you have
- Band photos, both from a photoshoot and from shows
- Album art, if you’ve released anything
- A bio about the band
- Music videos if you have any, or videos of your band performing
- Links to your social media, other websites, and places to buy your music
- Flattering quotes from past press
- The contact info for your band
The website needs to be presentable, but it doesn’t need to be fancy or expensive. The promoters you’ll be sending this to will care more about what’s in the EPK than how it looks.
Once you’ve built your EPK, then buy any equipment you’ll need to play a show.
The equipment you should purchase will depend on your particular band’s needs.
No matter what, make sure that everyone has some way to be amplified. Guitar amps for electric guitars and basses, pickups for acoustic guitars, and clip-on mics for strings or horns.
If you’re using electronic elements, make sure that you have the necessary synths, programs, or drum pads to perform your stuff.
Also, it doesn’t hurt to have a spare PA. There will be lots of gig opportunities at the beginning that don’t have a PA for you to use.
So not only can you get more gigs with a PA, you can charge more as well.
Step 10: Spread the Word
Once you’ve found some shows, it’s time to start promoting yourself.
This will be an all-hands-on-deck operation. You’ll need to be putting up posters, creating events on social media, and telling your friends. In fact, tell your friends to tell their friends.
You want as many people to show up at your first few shows as possible. That will show the venue owner that you can bring in some money, meaning they’ll invite you back again.
With a crowd, you’ll have the energy you need to have a killer performance!
BONUS: Look For Other Professionals
Once you start getting traction as a band, it’s time to get some new people on your team.
To grow as a band, you’ll need the expertise of others.
![]()
You’ll need a manager to handle the day-to-day tasks.
You’ll need a booking agent to help you get more gigs.
You’ll need an accountant to handle your now-more-complicated finances.
You might even need a marketing team to spread the word about your band.
Who you get is up to you. Some bands will even just get the advice of friends who have already done it.
Regardless of what you do, having a team is one of the best ways to grow your career.
But don’t get them too early. Otherwise you’re just throwing away money.
Wait until you’re transitioning from garage band to featured performer. Then make it happen!
Conclusion: How to Start a Band
This seems like a lot of steps, but it’s actually a very simple process.
There’s no reason you shouldn’t start a band today. Go out there and make some music.
Next Steps
If you want to dig deeper into music production and learn what it actually takes to make mixes that sound pro…
And you’re an intermediate or advanced producer…
Be sure to check out the free masterclass:
Enjoy!


