


“Wow, this singer sounds GREAT!”
Even though the rest of the band is important, the average listener pays the most attention to the vocal.
Creating a tight, in-sync band performance can easily be wasted by a less-than stellar vocal performance.
In this article you’ll learn how to use pitch correction to make your vocals to sound real and radio-ready.
I’m guessing you’re here because you want to make your mixes sound professional. We put together a brief training that covers a totally new approach to music production. Until now, everyone has been teaching production totally backward. Just click below to watch.Get industry-quality every time (steal this framework)
But if you just want to learn all about Pitch Correction specifically, keep reading.
[This is a part of a series on editing. Make sure to check out Part 1 (The Importance of Editing) and Part 2 (How to Tighten Up Your Timing)]
Step 1: Comp Your Vocal
Also like with the band, the most important step in getting a great vocal is the performance itself! Don’t push yourself past any breaking points (both physically and emotionally), but record takes until you feel that it already sounds good as is. Your overall goal (which applies to singers of all talent levels) should be to get the best take that the singer can give.
The easiest and best way to reach this overall best take is through a process called “vocal comping.” I always like to describe this as “copying and pasting” to make the best vocal take possible.
When recording the vocal, record and keep each pass on track playlists. Once you (and the singer) feel that you have multiple great takes, listen through each take line by line (i.e. first line of first verse on take 1, take 2, take 3, etc.). Pick each line that sounds best and copy and paste it to a new “Comp” playlist.
You can be as picky as you’d like, but don’t over-analyze it. You can pick specific words that sound better on a certain take, but I recommend not going through completely word by word, or you’ll drive yourself mad!
Once you’ve gone through the entire song, you should have a single vocal take of puzzle-pieced lines from various takes.
As you’re cleaning your vocal, make sure to crossfade any areas where you switch between vocal takes (whether that be from the comping process or from punching in while recording). If you do not crossfade between audio clips, it will create loud pops and clicks in the track.
Step 2: Prep Your Vocal
This step definitely does not make or break a vocal performance, but I think it is a quick and easy start towards the “pro” sound we’re all after.
After you’ve finished comping the vocal, solo the track and start listening for any unwanted sounds.
Singers will often make weird little noises throughout a vocal take, like lip smacks before breaths, clearing their throat in between lines, and so on. Once you start the mixing process, these sounds will likely become audible due to compression and EQ.
These random sounds are distracting to the listener. They’re an instant indicator of an amateur mix.
The first step to getting rid of these sounds is to find them. I recommend against going through quickly using your eyes only, as you might end up cutting out a quiet word or the end consonant of a word (s’s, d’s, and t’s commonly). I typically solo the vocal and listen through top to bottom and delete sounds as I hear them.
Make sure you don’t delete the breaths of the singer though. Breaths help the vocal to sound more natural and less “processed.” You can always adjust how loud the breaths are using volume automation.
Don’t forget to fade the ends of your clips to ensure there aren’t any pops or clicks as the clip starts. A few milliseconds should be plenty.
Step 3: Tune Your Vocal
As with all editing segments, this is a very touchy subject for musicians, singers, and artists.
Nearly all singers have a very strong sense of pride (or, let’s face it, an ego) about their singing. No one wants to sound fake! Your fans can tell.
The blunt reality is this:
90% of the vocals you hear on commercial songs have had pitch correction to some degree.
Whether it is every single note being adjusted, or just a few notes throughout the song that need help, the overall goal is to make the vocal sound as great AND as natural as you can. When done correctly, you shouldn’t even be able to notice that the vocal has been tuned!
Pitch editing is dependent on style and performance. If the song has a modern feel (like pop, pop country, some rock, etc.), you will most likely want to go for a tighter tuning, where most notes adjusted to be nearly perfect. If the song leans towards an indie/raw/old school vibe, you will most likely want to selectively adjust problem notes as needed.
Regardless of the genre, the skill of the singer will affect how much tuning is necessary. If the singer absolutely nails the vocal, you might only need to adjust a select few problem notes. If they had a tough time, you may need to adjust most of their notes.
Below is an excerpt of a vocal I tuned using Melodyne, one of the most popular tuning plugins.
The first step after transferring the vocal into your software is to separate any notes it may have missed or incorrectly identified.
You also want to separate any breaths or long sibilant sounds that do not have a pitch (like long s’s or th’s). Breaths and sibilant sounds can sound “washy” if you change their pitch.
You can easily identify sibilant sounds because they do not have a pitch line through them, but always use your ears to check.
You can set the key of the song within Melodyne so that the vocal segments will snap to notes in the scale of the song. Just go to options > scale editor > selection & master tuning. If you use a different tuning program, do a quick Google search on how to do this.
Once that’s done, simply drag your problem notes to the desired pitch.
Finally, use tools like “Pitch Drift” or “Pitch Modulation” to help keep the actual pitch (thin red line) steady and on pitch. DO NOT flatten it out completely, or you will lose all of the human-aspect and it will sound fake/edited/etc.
But How Do I Make It Sound Natural?
Not trying to take the easy way out of answering this question, but: practice. Vocal tuning programs have many different tools to adjust the notes, and it takes a combination of most of these tools to make a vocal sound naturally tuned. Watch as many instructional videos as you can to learn different tricks that different engineers use!
Key Tuning Points
- If you can hear it, you’re doing something wrong. If you start “hearing” the tuning, slow down and try some of the other tools in the software.
- Tune by hand whenever possible. Adjusting each note as necessary will generally sound more natural,since each move is intentional and not a computer generated guess.
- Use multiple tuners. This is just like the rule of serial compression: multiple compressors doing a little will sound more natural than one compressor doing a lot. My go-to is to use a hand tuning software (like Melodyne) on my first plugin insert, and AutoTune on the second insert. First, set AutoTune to a verrry relaxed setting, as to only slightly and slowly shift notes as needed. Then go back to Melodyne and adjust any notes that still stand out to you as needed. This will also allow you to move notes a shorter distance which will keep it sounding natural.
- Don’t make it perfect. Simply put, even the best singers in the world do not sing 100% locked onto the note center. If you keep each note fully locked onto the note center, you’ll end up with a very robotic and non-believable vocal. You will also be guaranteed to be able to hear the tuning, which breaks the first rule of tuning! My go-to tactic is to move the vocal to the desired note, but NOT completely flatten the actual pitch line and let it have natural variance (refer to the Melodyne GIF – I’ll move the yellow note block to the desired note, but not completely flatten the red line/actual pitch).
One other advantage to hand tuning a vocal is that most tuning softwares offer time-related editing as well!
Since you’ve spent so much time earlier editing the band to feel great timing-wise, it is very worthwhile (and sometimes necessary) to adjust the timing of the vocal to match the groove of the band. This will enhance the groove and feel of the entire track immensely.
UPDATE: Struggling with unrealistic sounding autotune? Watch this:
What Else Do I Need to Do to Finish Editing My Song?
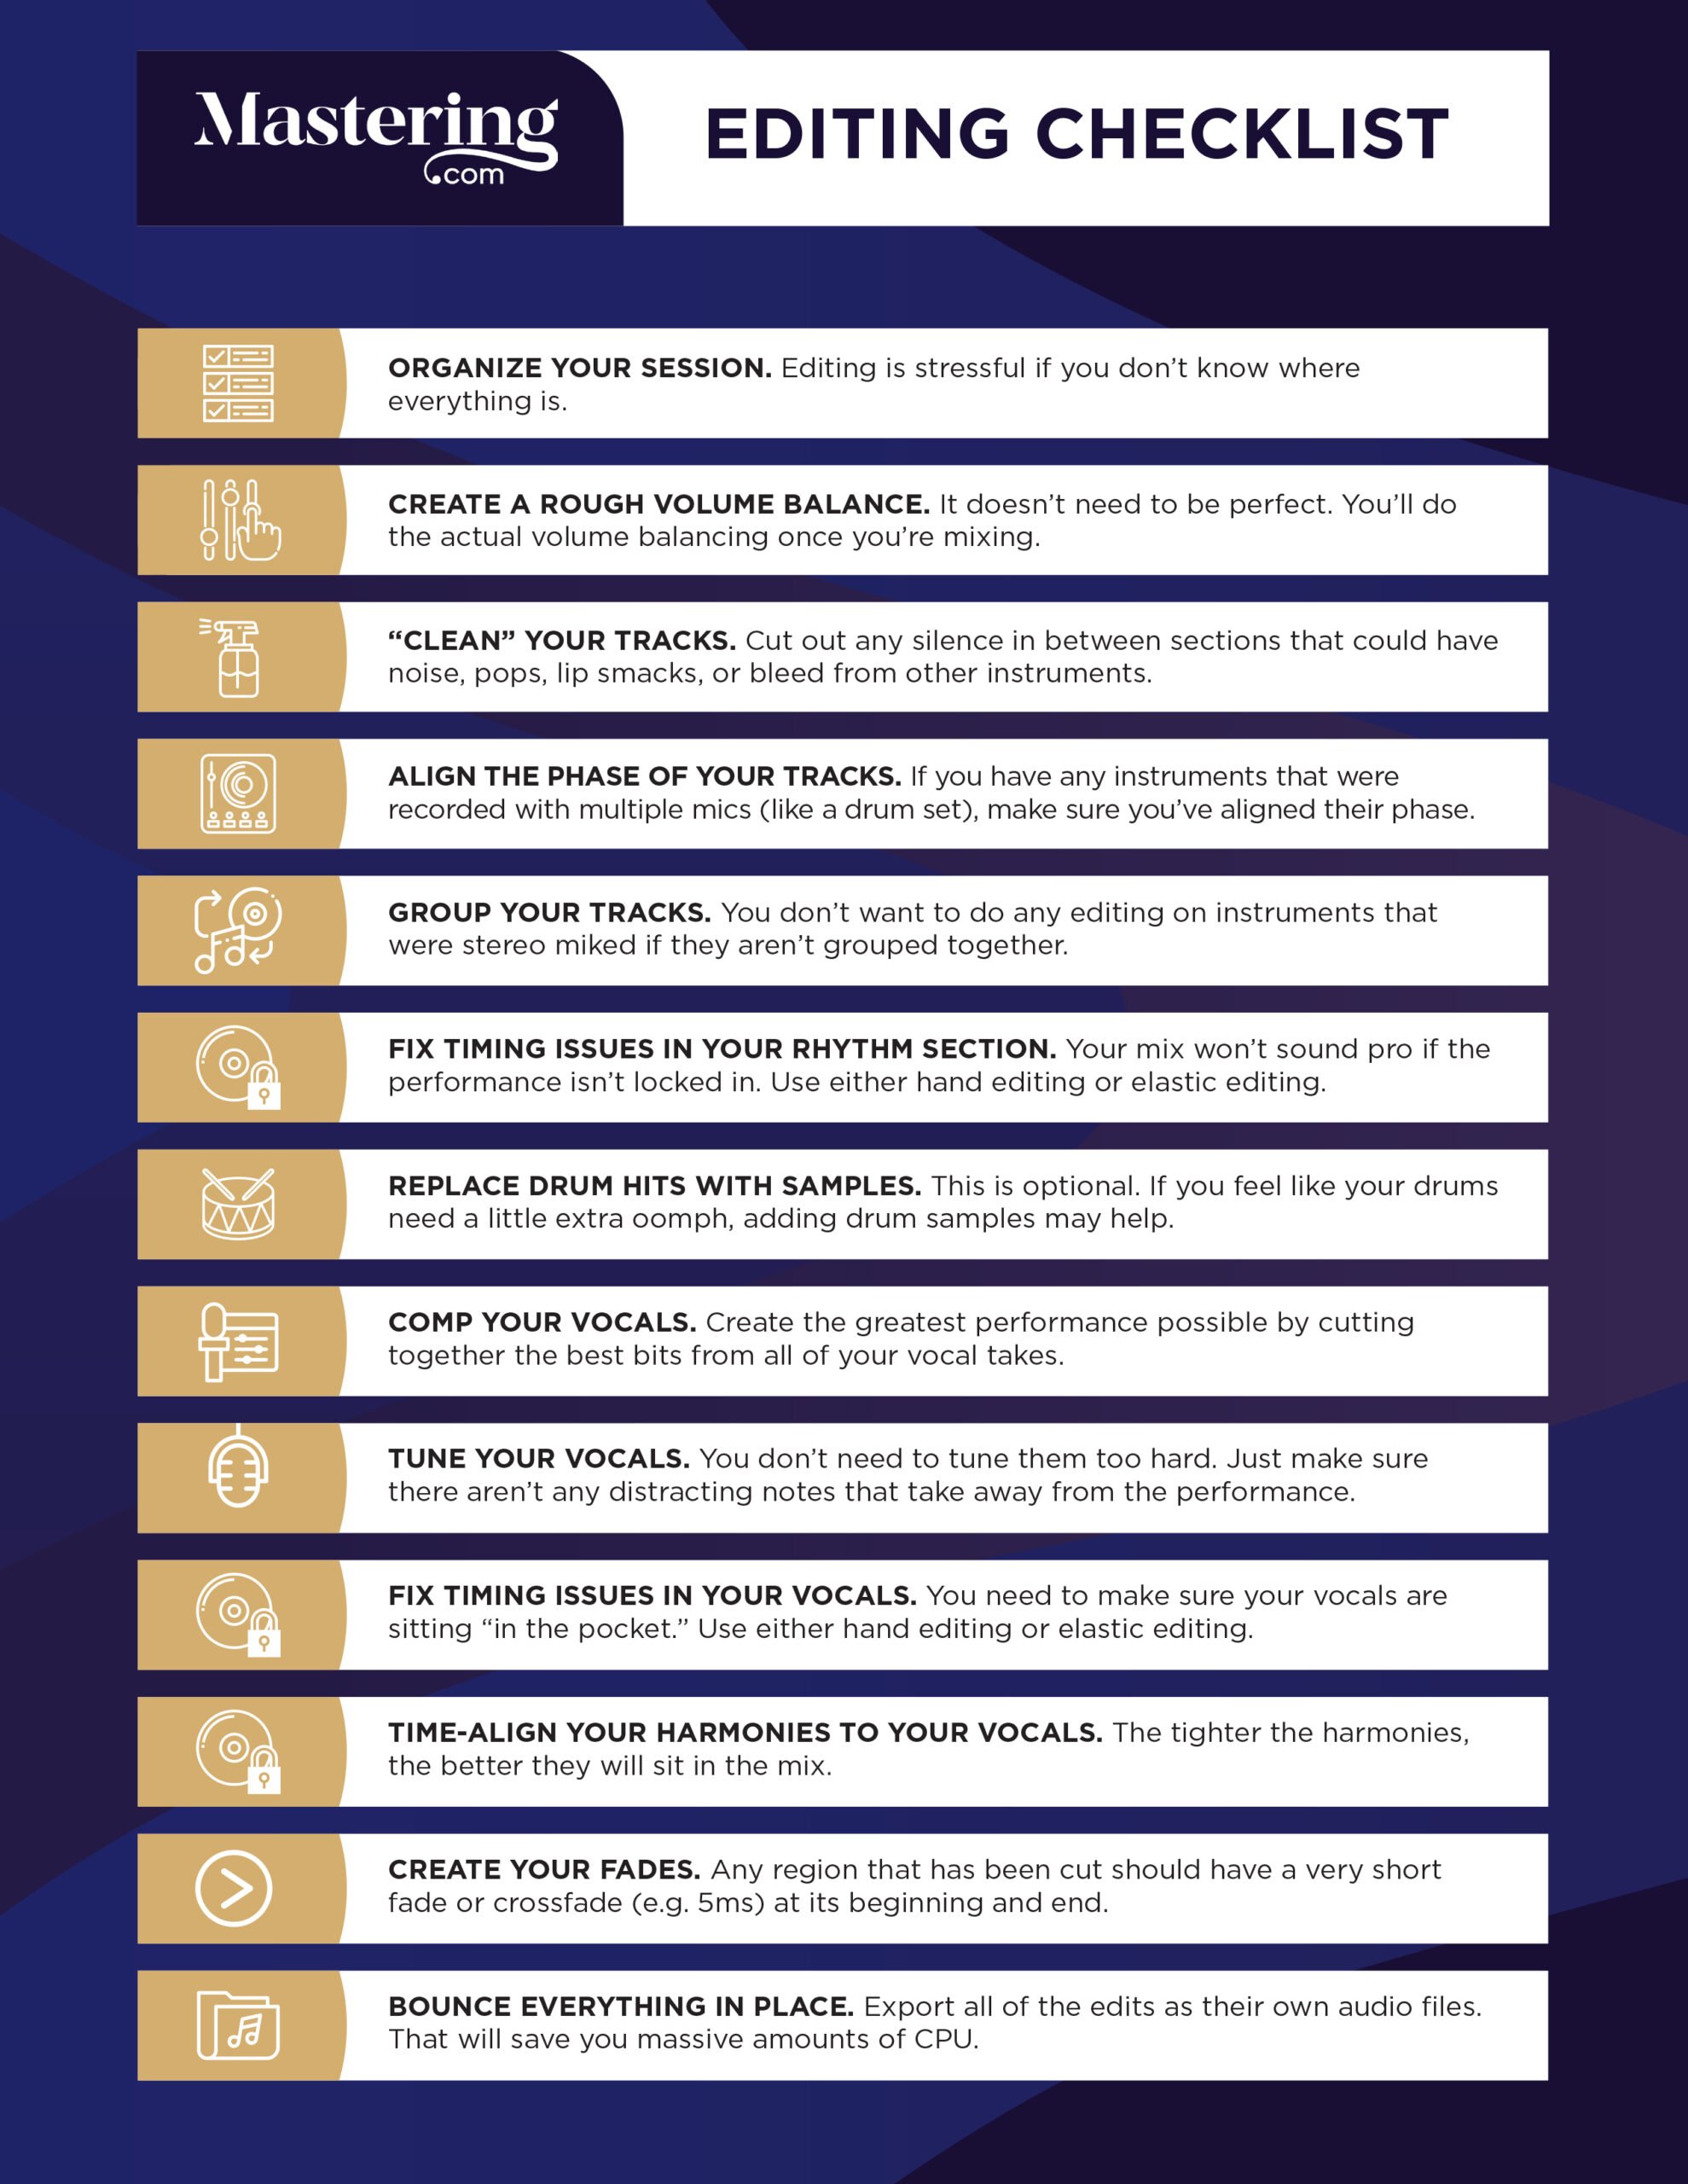
Tuning your vocals is only part of the battle. To finish editing your mix, make sure to complete this checklist:
Conclusion: Pitch Correction
While mixing is still an extremely important step, the editing steps help to fix issues that your average listener is more likely to hear.
Spending the extra time on this helps get your songs sounding closer to the “pro sound” from the start. Plus, it’ll make mixing more productive by eliminating distracting problems.
This will make the song much more enjoyable to listen to for both your consumer and yourself as you work on it!
Next Steps
If you want to dig deeper into music production and learn what it actually takes to make mixes that sound pro…
And you’re an intermediate or advanced producer…
Be sure to check out the free masterclass:
Enjoy!


