


Synthesizers are more important than ever. They’re all over Top 40 radio hits and even dominate underground music scenes.
But all the techno-jargon around synths can make them really hard to learn.
fm
Today you’ll learn the 4 basic building blocks that all synths share.
This is the first part in our Synthesizer 101 series.
Following along with these articles. You’ll learn everything you need to make new and exciting sounds in your synth of choice!
I’m guessing you’re here because you want to make your mixes sound professional. We put together a brief training that covers a totally new approach to music production. Until now, everyone has been teaching production totally backward. Just click below to watch.Get industry-quality every time (steal this framework)
But if you just want to learn about synthesizers specifically, keep reading.
Synth Basics (Everything You Need to Know)
The 4 Basic Building Blocks of Synthesizers
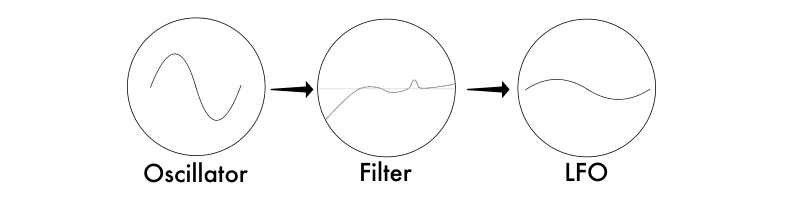
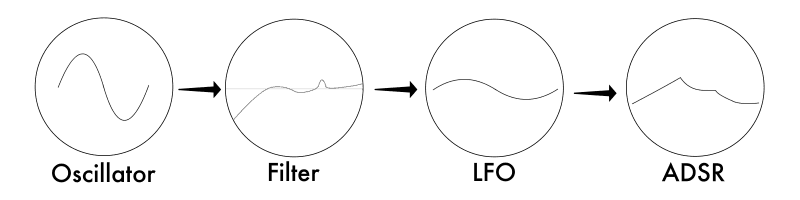
Almost every synth is made up of 4 basic parts:
- An oscillator
- Filters
- LFOs
- and an ADSR envelope.
Don’t worry if all of these words are baffling right now. By the end of this series, they’ll be second nature.
When working with synths, you’ll see “signal flow” coming up a lot.
Signal flow is just a fancy way of saying, “Thing A happens, and after that, Thing B happens.” In other words, the order of operations.
Let’s imagine you’re building a house. In what order would you construct it?
First, you’d make the foundation so the rest of the house has something solid to stand on.

Then you’d put in the frames to show where the walls will be.

After that, you’d fill it out with actual walls.

Then add the finishing touches to make it look like a real house.

Making a synth sound follows a similar flow.
First, you create a basic sound. Then, you build the general outline of the synth off of that. Once the “frames” of the synth are put up, then you add your finishing touches.
I’m going to take you through the 4 fundamentals of synths step by step. You’ll see how you can make your own synth sounds along the way.
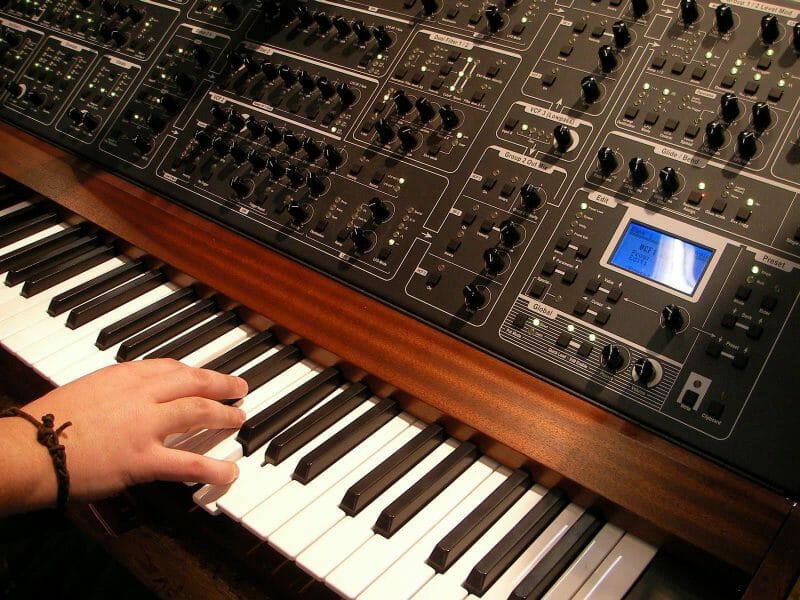
Let’s start with the most basic ingredient of every synth… the oscillator.
Building Block #1: Oscillators
Oscillators are the fundamental building blocks of a synths.

The word “oscillator” sounds complicated, but it’s a fancy word with a simple meaning. An oscillator creates a sound.

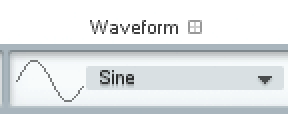
A sine wave is the most common sound an oscillator can make.
Sine waves are the most basic waveforms out there. It’s basically the sound of one single frequency, with no harmonics on top.

What do I mean by harmonics? Harmonics are the extra frequencies that are added above the note you’re playing.
Playing a C note on a piano sounds different than playing C on a guitar. That’s because the two instruments add different harmonics on top of the note.
But a sine wave doesn’t add any harmonics. When you hear a sine wave, you’re hearing one singular frequency. So it’s sound in its most pure form.
Fun fact: Sine waves are impossible to create without a computer! No other sound in nature can produce a single frequency.
Here’s what a sine wave sounds like:
Very round, right? Well, sine waves aren’t the only waveforms oscillators can make. Each waveform has an entirely different sound.
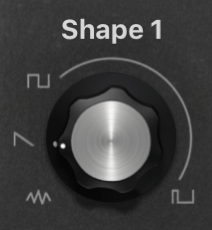
You can kind of guess how a waveform will sound by looking at its shape. A sine wave is very round and so is the sound it creates.

While a saw wave looks jagged…

…so it creates a sharp sound.
When the shape of the waveform changes, the sound changes. Because of that, there are tons of different waveforms an oscillator can produce.
Find the oscillator in your synth and see what waveforms it’ll let you use. Spend some time listening to each one and getting a feel for how each sound is different.
Many synths even have more than one oscillator. So you can layer different waveforms on top of each other.
It’s a great way to make your synth sound more full and complex.
Now that we’ve built the foundation of our house, let’s start adding the frames with our next building block: Filters.
Building Block #2: Filters
If you’re familiar with EQing, this should be really familiar! Filters are just EQs inside of your synth.

Filters do exactly what the name suggests. They filter out parts of the sound.
They’re super helpful for shaping a synth’s tone.
There are two main kinds of filters out there:
- Low pass filters (LPFs)
- and High pass filters (HPFs)
Low pass filters cut out the high frequencies of the synth.
It’s kind of confusing that the filter with “low” in the name cuts out high frequencies. But think of it this way: a low pass filter allows the LOWS to PASS through… but FILTERS out the highs.
If the synth sounds too harsh and shrill, you can use an LPF to cut out some of the higher frequencies.
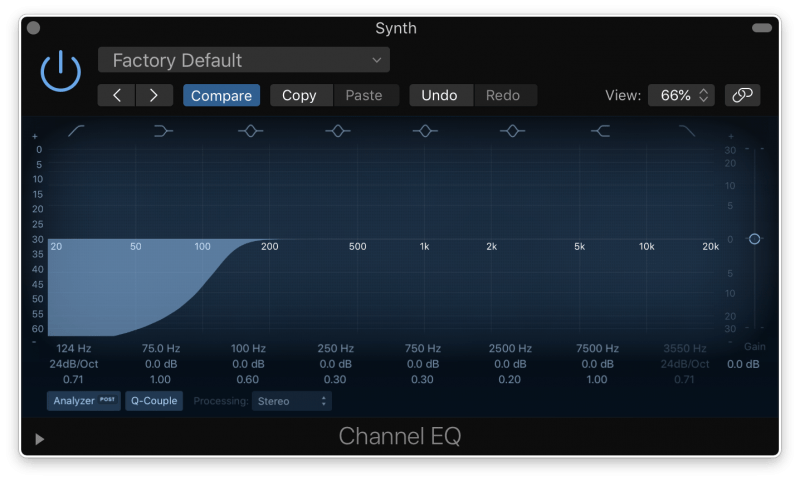
A high pass filter does the exact opposite. It allows the highs to pass through while cutting out the lows.
If the synth is way too bass-heavy, you can turn down those overwhelming low tones with an HPF.
Most filters have a knob labeled “Cutoff.” This is where the filter starts cutting out frequencies.
It’s kind of like the greeter at a restaurant. Before you can go inside, a host has to meet you at the front of the restaurant and invite you in.

The cutoff is where frequencies are invited in. Everything outside of the cutoff is turned down.
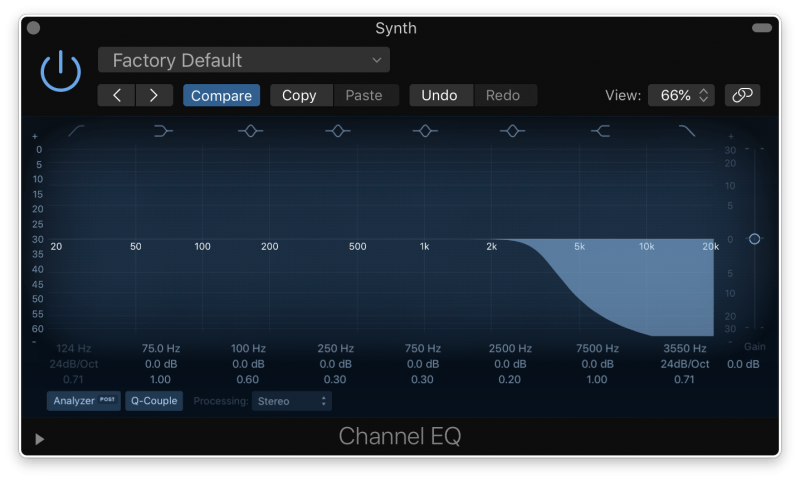
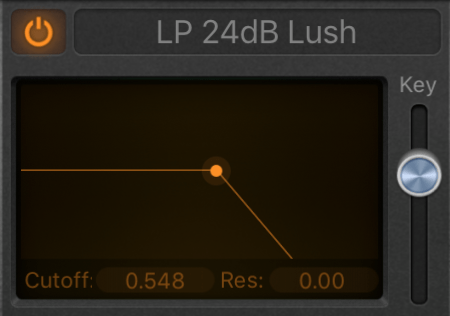
Take a look at this EQ with a low pass on it.
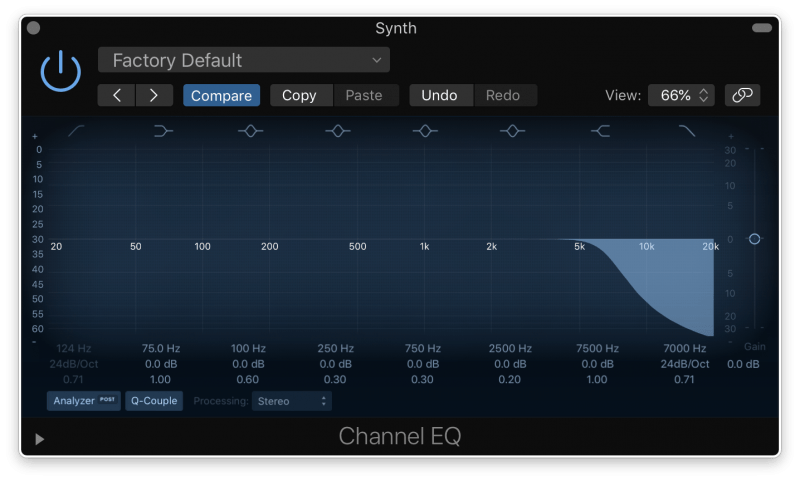
The filter is set to cut out everything above 7kHz. This means 7kHz is the cutoff frequency.
When you set the cutoff, you’re telling the filter what frequency it should start cutting the sound off at.
A lot of filters also have something called “Resonance.” Resonance allows you to turn up a few frequencies.
So if you have a low pass filter cutting everything above 7kHz, you could have a resonance that boosts the sound at 6kHz.
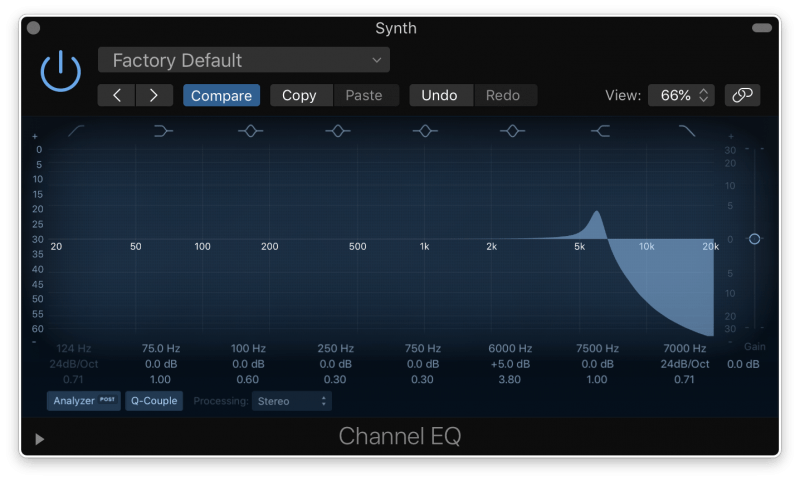
This can be really handy when you’re trying to hone a synth’s tone or help it punch through a busy mix.
Look for the filter section in your synth and see how different kinds of filters affect the sound.
Many synths have more filter options than just cutting out the high or low frequencies. See what your synth has and play around with the different options.
Now that we’ve set the tone of the synth, let’s move on to our next step in the building process: LFOs.
Building Block #3: LFOs
LFOs are particularly confusing to beginners. So let’s demystify them a bit.
LFO stands for Low Frequency Oscillator. LFOs are special oscillators that create sound waves that are so slow we can’t actually hear them.
LFOs aren’t like regular oscillators.
You don’t use them to create new sounds. Instead, you use them to affect the sounds you already have.
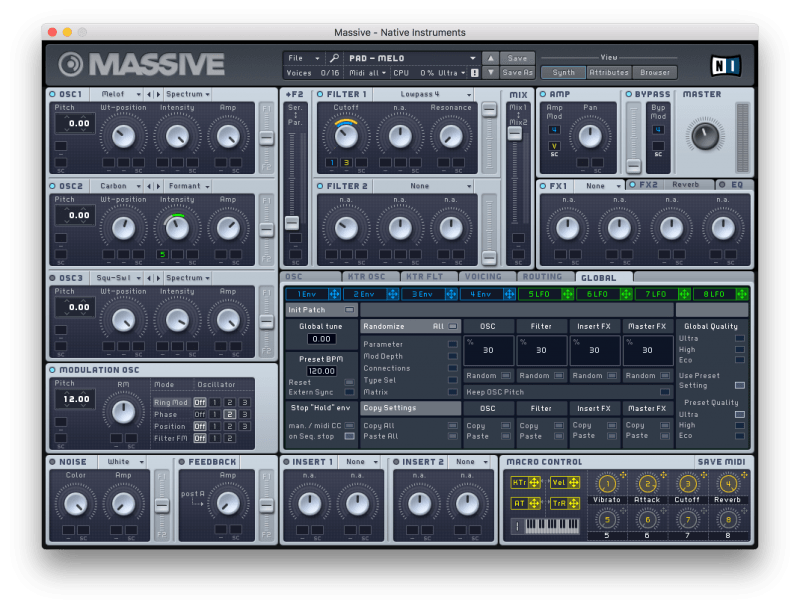
What you see here is the LFO section of a synth called Massive by Native Instrument’s. LFO’s look different in different synths, but they all do the same thing.
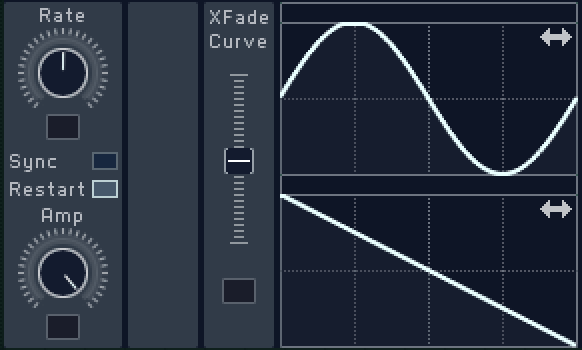
LFOs create really slow waveforms. If a sine wave from a regular oscillator looks like this:

A sine wave from an LFO would look like this:

You can apply the waveform an LFO creates to other parts of your synth.
For example, let’s say I want my synth to fade in and out over time.
By connecting an LFO to the volume of my oscillator, I can do that. As the LFO’s waveform moves up and down, the volume of my oscillator will increase and decrease.
So the synth will be loudest at the highest point in the LFO’s waveform, and it’ll be silent at the lowest point.

First I have to set how loud and how quiet I want the synth to get. I can change this by changing the LFO’s depth setting.
It’s called depth because it describes how deep the LFO’s waveform is. Basically, you’re making the top and the bottom of the LFO’s waveform even taller or shorter than before.
Since the LFO’s waveform is larger (or smaller), that means the effect is larger (or smaller).
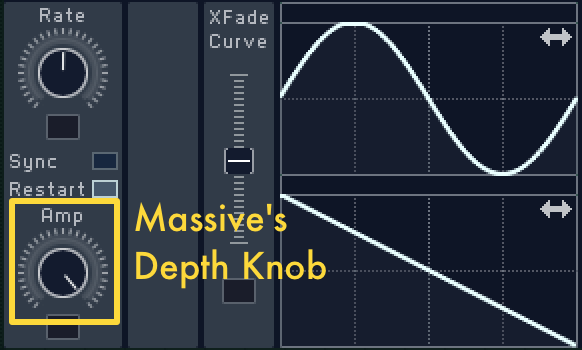
As you can see, not every synth calls it a “depth” knob. If you see a knob in the LFO section of your synth called “Intensity” or “Amplitude,” it probably controls the depth.
So the higher the depth, the more noticeable the effect.
Once I’ve set the depth, I’ll set the speed of my LFO.
This is often called the rate. This is how fast the LFO’s waveform is.
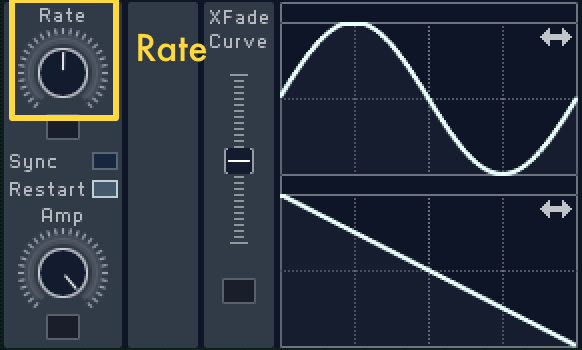
Many LFOs can sync with the tempo of your project. I want my synth to fade in and out in time with the song, so I’ve set the rate to 1/8.
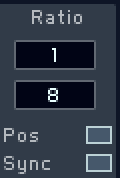
This means the synth will follow an 8th note pattern of turning up and down.
Here’s what it would sound like:
You could also connect an LFO to your filter to create a cool effect where the tone of the synth changes over time.
These are just a couple of ways you can use LFOs.
The possibilities are really as limitless as your imagination (and the complexity of your synth).
We’ve now finished up 3 of our essential building blocks. Now let’s check out the final synth component… the ADSR envelope.
Building Block #4: ADSR Envelope (aka Amp Envelope)
An ADSR envelope might look like just another waveform, but it’s completely different.
It stands for Attack, Decay, Sustain, and Release, and it’s in charge of the volume lifecycle of each note the synth produces.
Confusing? It’s actually easier to think of it as a roller coaster inside your synth.

Let me explain…
A (Attack)
If the entire envelope is a roller coaster, the attack is when you’re going up the first hill.

A particularly fast coaster might launch you up to the peak really quickly. Or the car might crawl slowly to the top.
Just like it takes time for a car to reach the top of a hill, it takes time for a sound to reach full volume.
Attack is how long it takes for the sound to get to full volume.
A sound with a short attack will start playing immediately…
…while a sound with a slow attack will gradually fade in.
D (Decay)
Once the coaster has reached the top of the hill, it rushes down. Decay is the time from the top of the drop to the bottom.

This is how long it takes for the sound to start fading out after the initial hit.
A snare would have a fast decay time, as the sound quickly fades from loud to quiet. A legato violin would have a long decay time.
A sound with a short decay will get quiet immediately…
…while a sound with a slow decay will stay loud for much longer.
S (Sustain)
This is how low the bottom of the drop is.

Sustain is the volume of the synth after the initial attack. So while decay is how long it takes to reach this second volume, sustain is how loud the synth is once the decay is done.
As long as the key is pressed, the sound will stay at this volume. If you want a sound to really ring out, you’ll want to give it a high sustain.
It’s important to realize this: sustain deals with the VOLUME of the note. Each other part of the ADSR envelope deals with the LENGTH of the note.
Take that into account when you are creating your synths!
A sound with a low sustain will be quiet while the note is held…
…while a sound with a high sustain will be much louder while the note is held.
R (Release)
Release is the end of the coaster, when everything comes to a halt.

This is how long it takes for the sound to fade out once you’ve let go of the key. It kind of sounds like you’ve put reverb on the sound.
A sound with a slow release will slowly die off once you’ve let go of the key…
…while a sound with a quick release will die off immediately.
Using the ADSR Envelope
Setting the ADSR is crucial to getting the sound you want. If you’re trying to create a specific sound, think about what the ADSR should look like.
For example, if you want a really fast and explosive sound, you’ll want the attack, decay, and release to all be very short with a low sustain.
But if you’re trying to create a very ethereal sound that fades in and out slowly, you’ll want to make the attack, decay, and release pretty long with a high sustain.
This is a key part of sound design.
Congratulations: you’ve built your synth house! We’ve now covered the 4 main building blocks of each synth. Now that we’ve got the basics covered, let’s take a look at the history of synths and some of the different types you’ll run into.
History of Synthesizers
What makes synths different from other instruments is how they create sounds. Instead of physically making sound (like a guitar or piano), synths make math.
Synths converted into soundwaves and played out of a speaker so we can hear them.
How all of that works could be an article of its own. The main thing is that synths are totally electronic while all other instruments are acoustic.
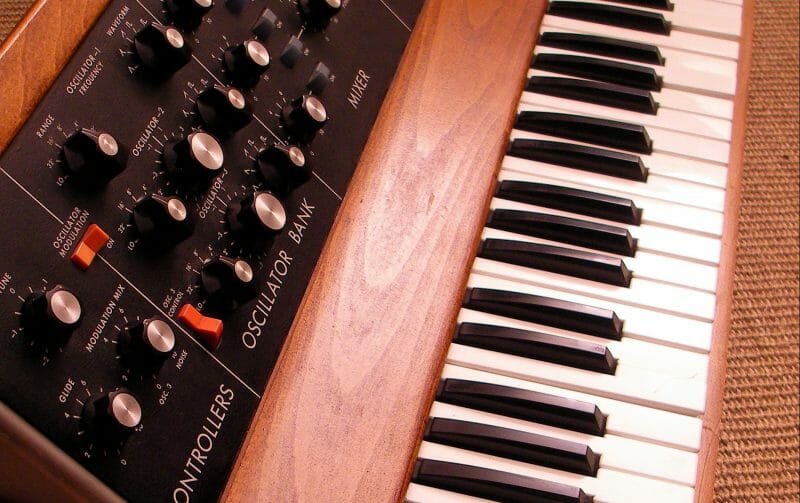
The Analog Era (1960’s and 70’s)
Different types of analog synths were being made throughout the early 20th century, but they didn’t really break into the mainstream until the early 1960’s
The first famous analog synths were created in the 60’s. These early modular synths gained popularity over the next couple decades, heard in songs from The Beatles, Led Zeppelin, Pink Floyd, and dozens of others.
While extremely powerful, early synths were hulking towers of wire and knobs. Too intimidating and expensive for most musicians, artists were eager to get their hands on something they could easily take on the road.
Digital Synths (1980’s and 90’s)
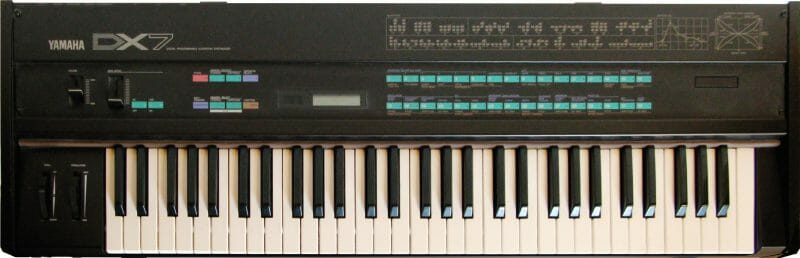
In the early 1980s the first digital synths hit the scene.
By using computer chips to create sound instead of complex circuits, digital synths quickly became lightweight and affordable. And people were ready to here something new.
Yamaha’s DX7 captivated artists and audiences alike. It made FM synthesis the sound of the decade.
Software Synths (2000’s to Today)
As home computers became more and more common, so did software synthesizers. Early software synths were built to copy their hardware predecessors.
But as time went on, home computers advanced. The creators of software synths began exploring entirely new methods of creating sound.
We’ll dig into the most important types of synths out there later. But for now, let’s cover the main features you’ll find in any synth.
The Different Types of Synthesizers
There are a few different types of synthesizers that are commonly used today.
The main ones you’ll see are…
- Additive
- Subtractive
- FM
- Wavetable
- and Modular.
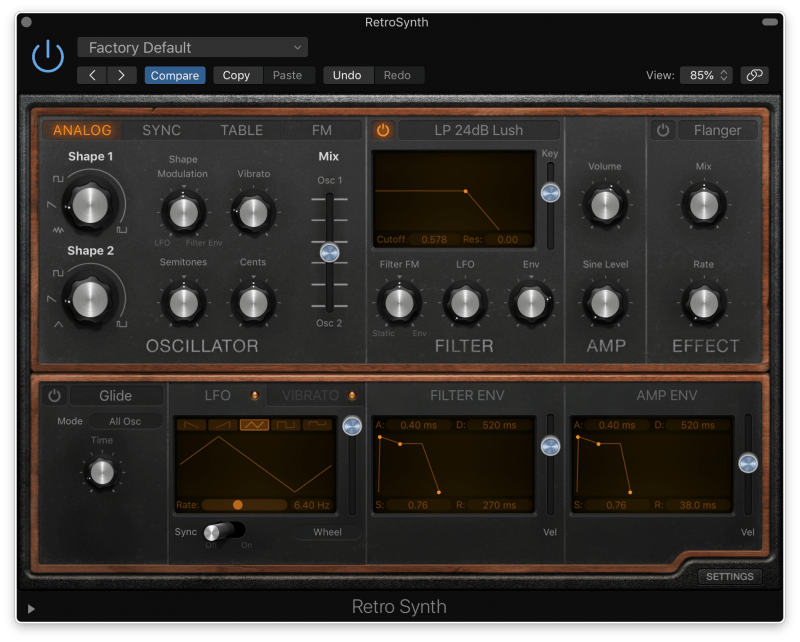
A lot of modern synths combine two or more of these synthesis methods. For example, Logic Pro’s RetroSynth lets you use wavetable, FM, and subtractive synthesis.
I’ll be covering each of these synths in more depth as a part of my Synth 101 series. So be sure to check each article out to get a better idea of what they all do!
But for now, here’s a quick summary of the main kinds of synths you might run into.
Additive and Subtractive Synths
Additive and subtractive are two of the earliest forms of synthesis.
Remember how I said sine waves are the most basic sounds out there?
Additive synths make more complex sounds by combining sine waves that have different pitches.
By layering these different sine waves on top of each other, you can make a whole host of interesting sounds.
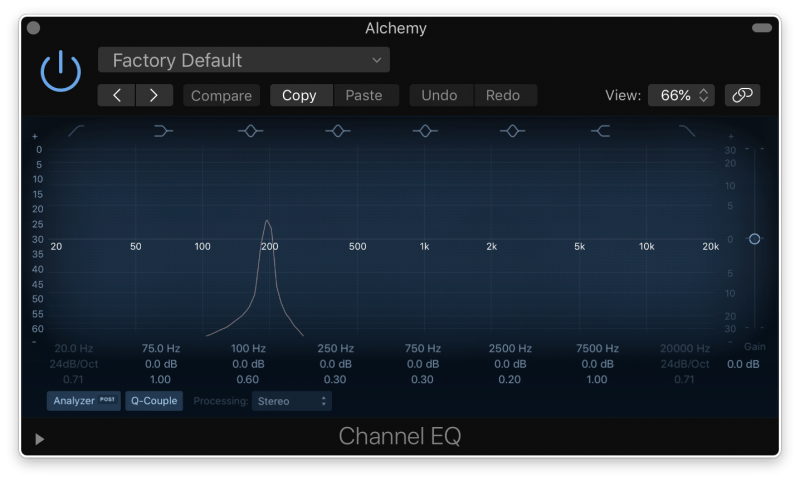
Using Logic’s Alchemy synth, I’ve layered four different sine waves on top of each other. Each one is one octave higher than the previous.

As you can see, when only one of the sine waves is active, it just makes one frequency.
But when all four sine waves are on, four frequencies are being played.
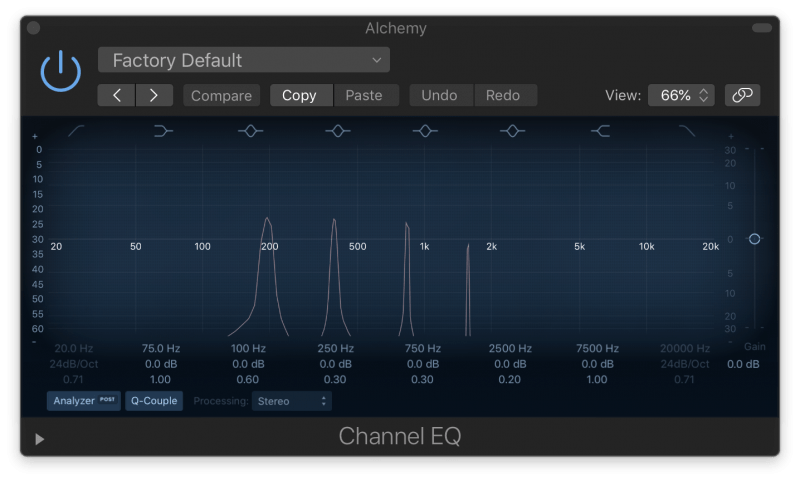
Even a small change like this is enough to drastically alter the sound. Instead of a pure, round synth, you end up with something that sounds pretty sharp.
Subtractive synths take the opposite approach. They take complex sounds with lots of harmonics and filter out certain parts.
Say we wanted to create a really thick sub bass synth. We could use a filter to cut out most of the high-end frequencies of a sound, honing in on those lower bass tones.
This is subtractive synthesis in action.
Subtractive synthesis sounds like this:
FM Synthesis
With its sharp sound and inharmonic overtones, FM synthesis was the defining sound of the 80s. But it’s far from a thing of the past.
FM synths can create a wide variety of sounds, both retro and entirely new.
FM uses two different kinds of oscillators: carriers and modulators.
The carrier is the oscillator you actually hear. The modulator shapes the tone of the carrier.
Let’s say the carrier is this sine wave:
By itself, it just sounds like a simple, smooth sine wave.
The modulator is what makes FM interesting.
The oscillation of the modulator is applied to the carrier. It creates a totally new waveform.
So if we take our sine wave and apply a modulator wave that looks like this:

We end up with a totally new signal:

To be clear, we aren’t simply playing both of these waveforms at the same time.
The second waveform is being applied to the first oscillator. That completely changes the sound the carrier creates.
NOTE: We released a great video on how FM Synthesis works:
Wavetable Synthesis
Wavetable synths are so cool and so complicated. But with a little research, they’re actually pretty easy to use.
To understand what wavetable synths do, we need to talk about waveforms some more.
Here’s the waveform of a single piano note.
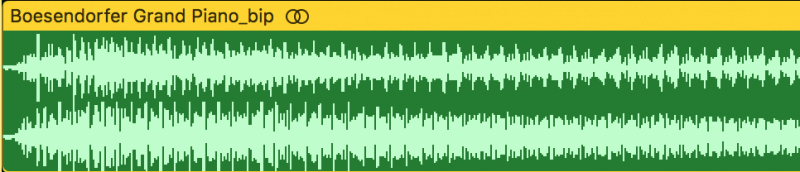
A wavetable synth can take this sample and turn it into a wavetable. This means it can take the waveform and play it back at any pitch you want.
What makes wavetable synths especially powerful is the ability to mix between wavetables.
By sampling different parts of an instrument’s sound, you can create wavetables that are subtly different from one another.
For example, I could get a really harsh sample of a piano note and then record a much mellower version of the same note.
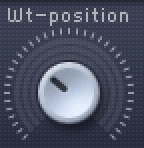
Most wavetable synths allow you to morph between wavetables. That means you can change the tone of the sound over time.
This can be really useful for creating completely new sounds.
Or for making something sound more natural. After all, most sounds change instead of staying exactly the same.
Here’s an example of a wavetable synth:
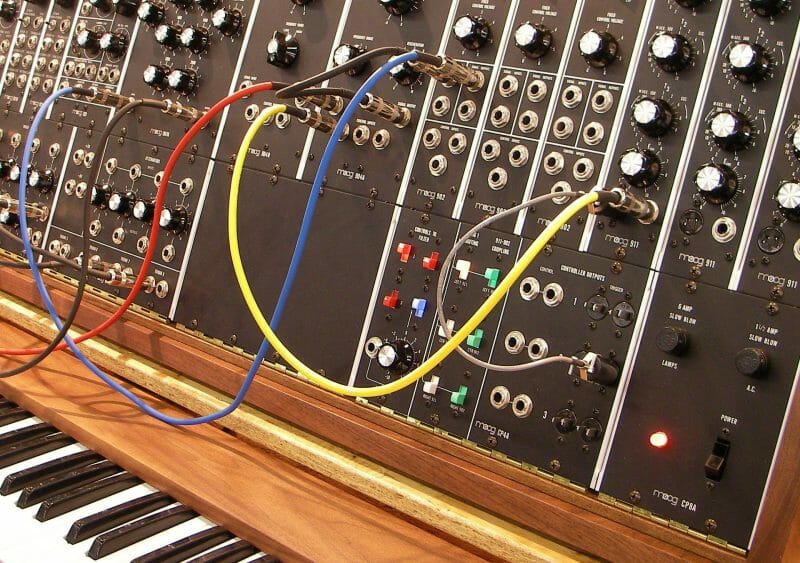
Modular Synthesizers
The holy grail of any synthesizer enthusiast’s collection! Modular synths are truly weird.
Most modular synths are hardware, but software versions do exist. If you’re willing to watch some tutorials, VCV Rack is a free modular synth plugin.
Rather than being one synth, they’re a collection of different modules that create different effects. That’s how they get their name.
The user can combine different modules together with patch cables. “Patch cables” is just a fancy way of describing wires you can use to connect different parts of the synth.
For example, you can run an oscillator into an ADSR envelope. You could then send that signal to a module with an arpeggiator, which would change the pitch of the sound over time.
Since you’re deciding what parts of the synth to connect, you have a lot of control over the sound you’re making. But it’s also 10 times more complicated.
It takes a lot of research and experimentation to learn the ropes of modular synthesis. But if you know what you’re doing, you can make incredible sounds with modular synths!
Do I Need to Buy an Expensive Synthesizer?
No!
In fact, to start out with, I have a recommendation. Get really comfortable with the stock synths that came with your DAW before dropping any money on a new synth.
Fancy synths definitely have some cool features. So if you have the means, it’s worth getting a premium synthesizer eventually.
But before you spend any money, learn the ins and outs of the tools you already have.
There are tons of YouTube tutorials for almost every synth out there.
Watch some tutorials for the synths you already own. Then start experimenting with them.
Only once you feel truly comfortable with your stock synths should you upgrade to something new.
Conclusion: What Are Synthesizers?
There are tons of different types of synthesizers. Mastering even one takes time and dedication.
But with the information from this article, you’ll be ready to jump into any synth and start making some great sounds!
If you want to dig deeper into music production and learn what it actually takes to make mixes that sound pro… And you’re an intermediate or advanced producer… Be sure to check out the free masterclass: Enjoy!Next Steps


